SOCIAL MEDIA

Showing posts with label tutorial. Show all posts

Wednesday, April 19, 2017

Saving the Special Moments: DIY Family First Aid Kit

This shop has been compensated by Collective Bias, Inc. and its advertiser. All opinions are mine alone. #MoreMomentsWithExcedrin #CollectiveBias


Saving the Special Moments DIY Family First Aid Kit Excedrin® Migraine First Aid Kit for the Family #MoreMomentsWithExcedrin #CollectiveBias #ad .jpg

One of our family traditions is to visit the apple orchard every year in the fall. My husband and I started doing this when we were dating and have only missed maybe one time in 10 years. These trips are a lot more fun now that we have Little Miss Sunshine in the picture! There’s nothing like seeing life through the eyes of a child.


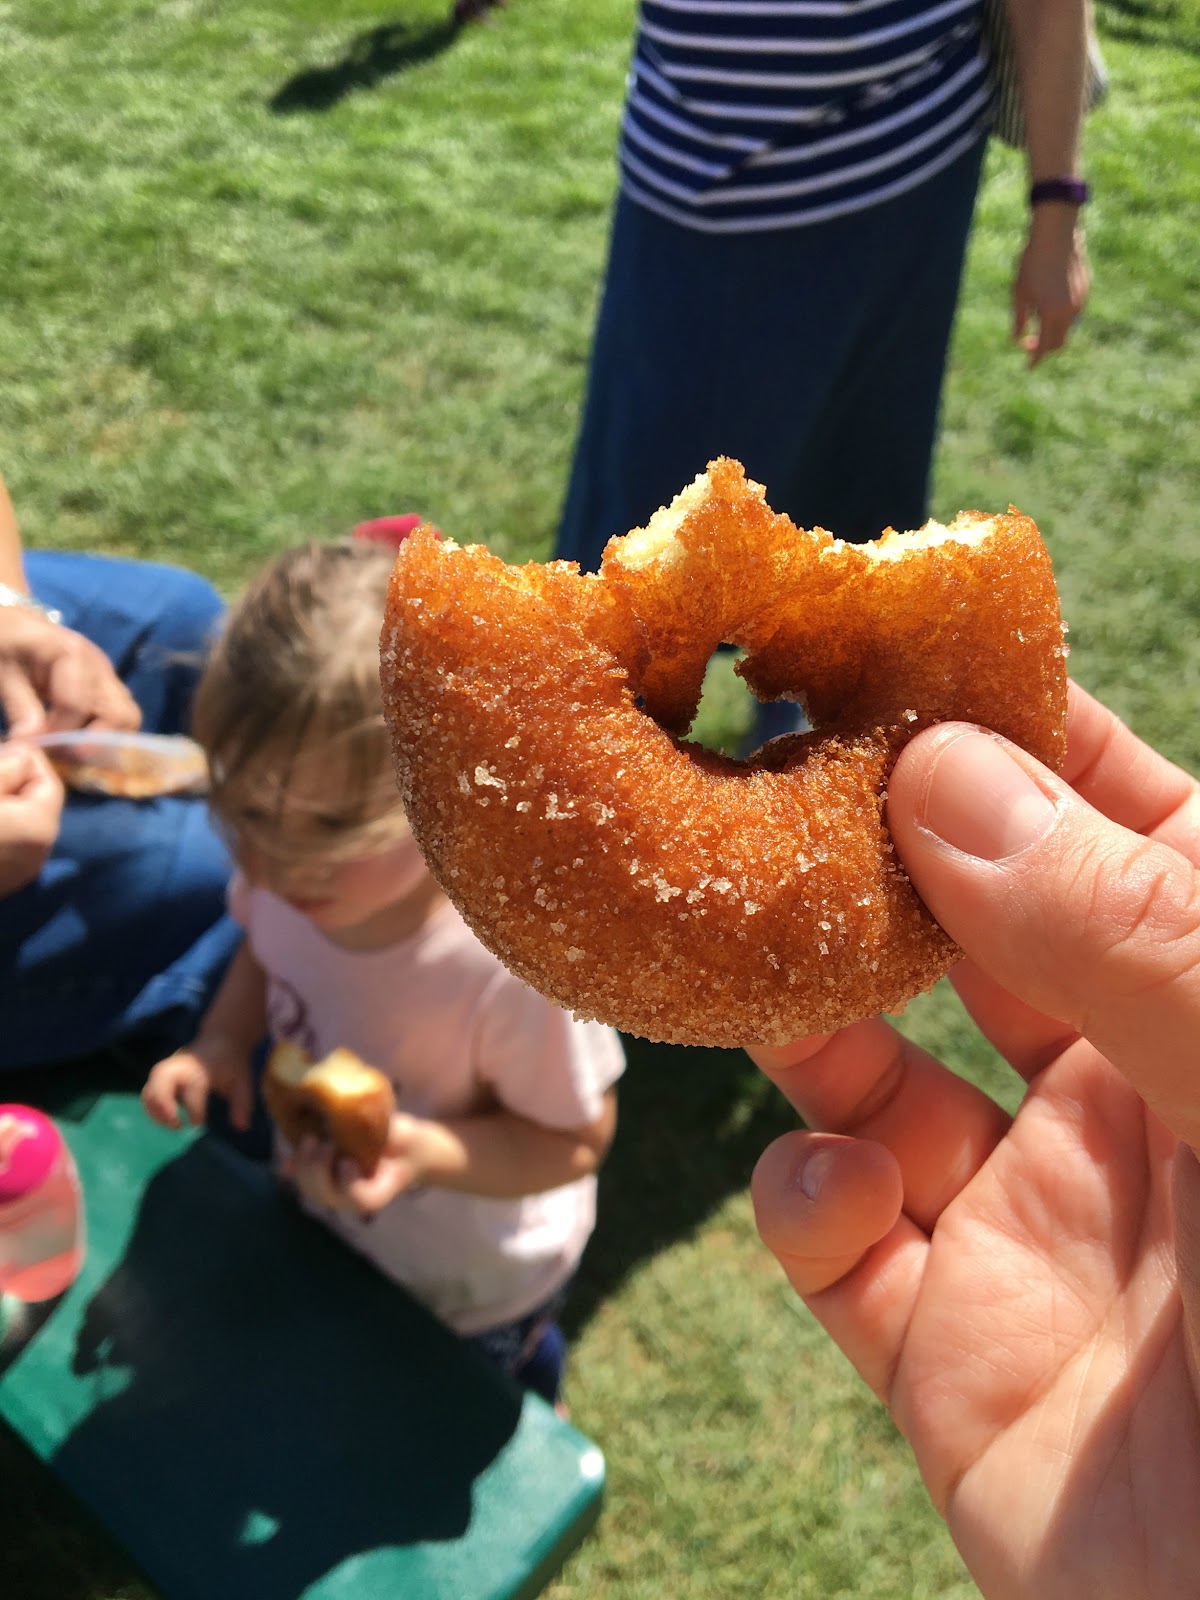
We look forward to it every year! I have to admit, one of our favorite parts is being able to enjoy those apple cider donuts hot and fresh from the kitchen! Yummy. They are definitely a fall staple, am I right?

Apple Cider Donuts.jpg

This past year was especially fun since Little Miss Sunshine was old enough to enjoy all of the activities. She absolutely loved it! You definitely have to be on your toes with a toddler! She is fast and definitely not scared or shy. These trips are not quite as relaxing as they used to be, but certainly more fun!


She enjoyed the slides, the playground equipment-- especially the school bus and train built out of wood. That seemed to be a kid favorite! There were plenty of tumbles and falls-- such is life with a toddler! Thankfully, her tears didn’t last long and she was on the move again.


She loved watching all of the animals at the petting zoo area. Her favorite part was watching the goat eat from a bucket that you could send out to a tall stand where the goats would climb up to eat from the bucket.


This year, my parents and younger brother were able to come along with us. Of course, Little Miss Sunshine gets spoiled by the grandparents so she got to go on a pony ride. She absolutely loved it--until she quickly got bored and wanted off the pony mid-ride. Toddlers!


But later on she wanted to ride again so she got a second ride. I told you she is spoiled!


I don’t know what it is about trips like this-- whether it’s the constant action and natural anxiety that I seem to feel in public situations (especially when taking care of the little one), the bright sunshine, or whatever the case-- I almost always end up with a terrible headache. I’ve had migraine headaches on and off since I was a child.


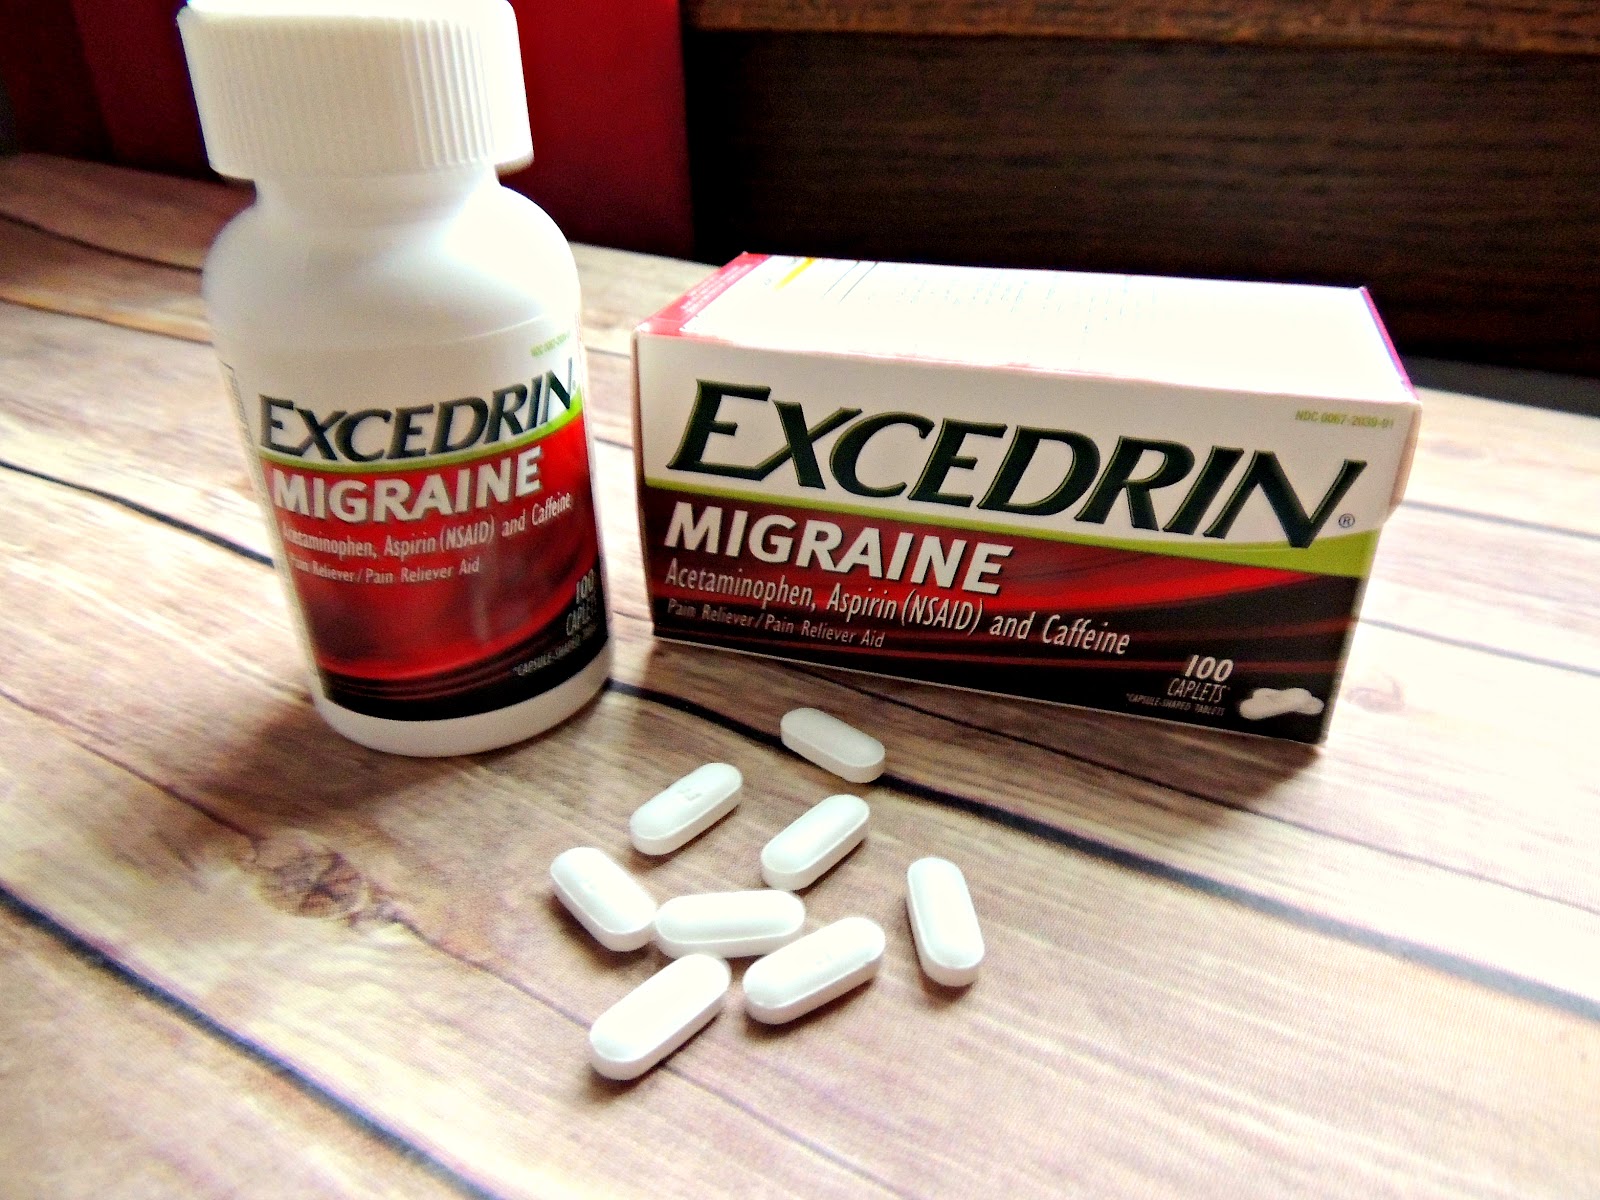
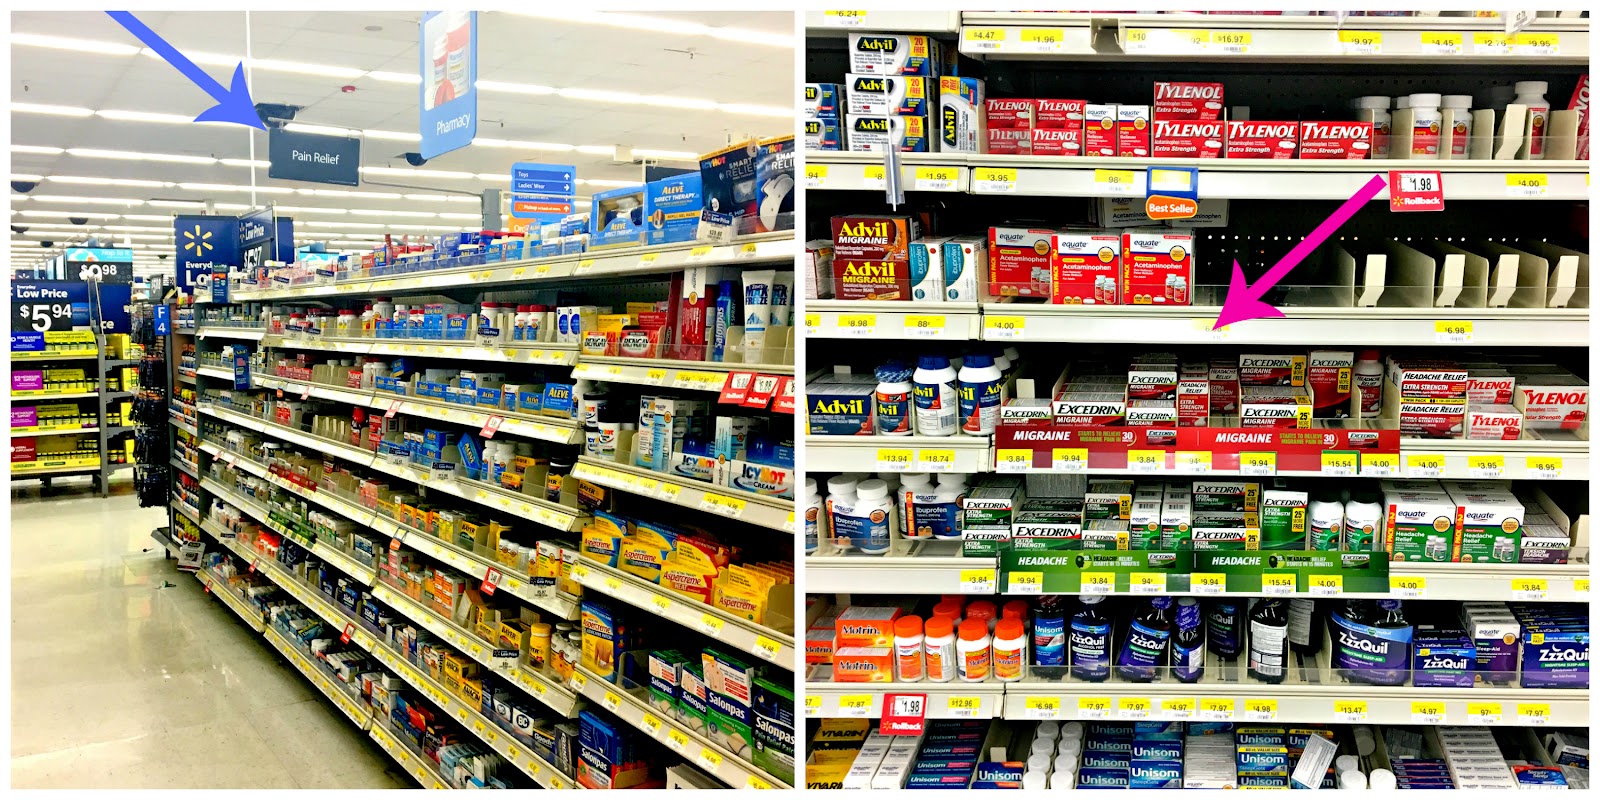
Whatever the reason, I know my headache requires a headache solution that will bring fast relief-- more specifically my migraine requires a migraine solution! I can use Excedrin® Migraine  and know that it will start to relieve migraine pain in 30 minutes. Afterall, it’s #1 Neurologist Recommended OTC.* (Among OTC medicine for migraines. Symphony Health Solutions, 2016)


Make sure to consult your doctor if you think you are suffering from migraines to make sure you receive a migraine diagnosis before you use Excedrin® Migraine.  If you use Excedrin® Migraine, definitely use as directed and refer to the Excedrin® instructions regarding usage on the bottle.

Excedrin® Migraine First Aid Kit for the Family #MoreMomentsWithExcedrin #CollectiveBias #ad 4.jpg

I buy Excedrin® Migraine at Walmart in the Pain Relief section near the pharmacy.


Excedrin® Migraine First Aid Kit for the Family #MoreMomentsWithExcedrin #CollectiveBias #ad #Walmart.jpg

To sum it all up, I’m thankful that I have a solution to these headaches so that I don’t have to miss out on these special moments in my life! It’s a good idea to keep Excedrin® Migraine on hand if you suffer from migraines. I like to keep some in the car with our family first aid kit essentials. It comes in useful on the ordinary days too.


Excedrin® Migraine First Aid Kit for the Family #MoreMomentsWithExcedrin #CollectiveBias #ad 2.jpg

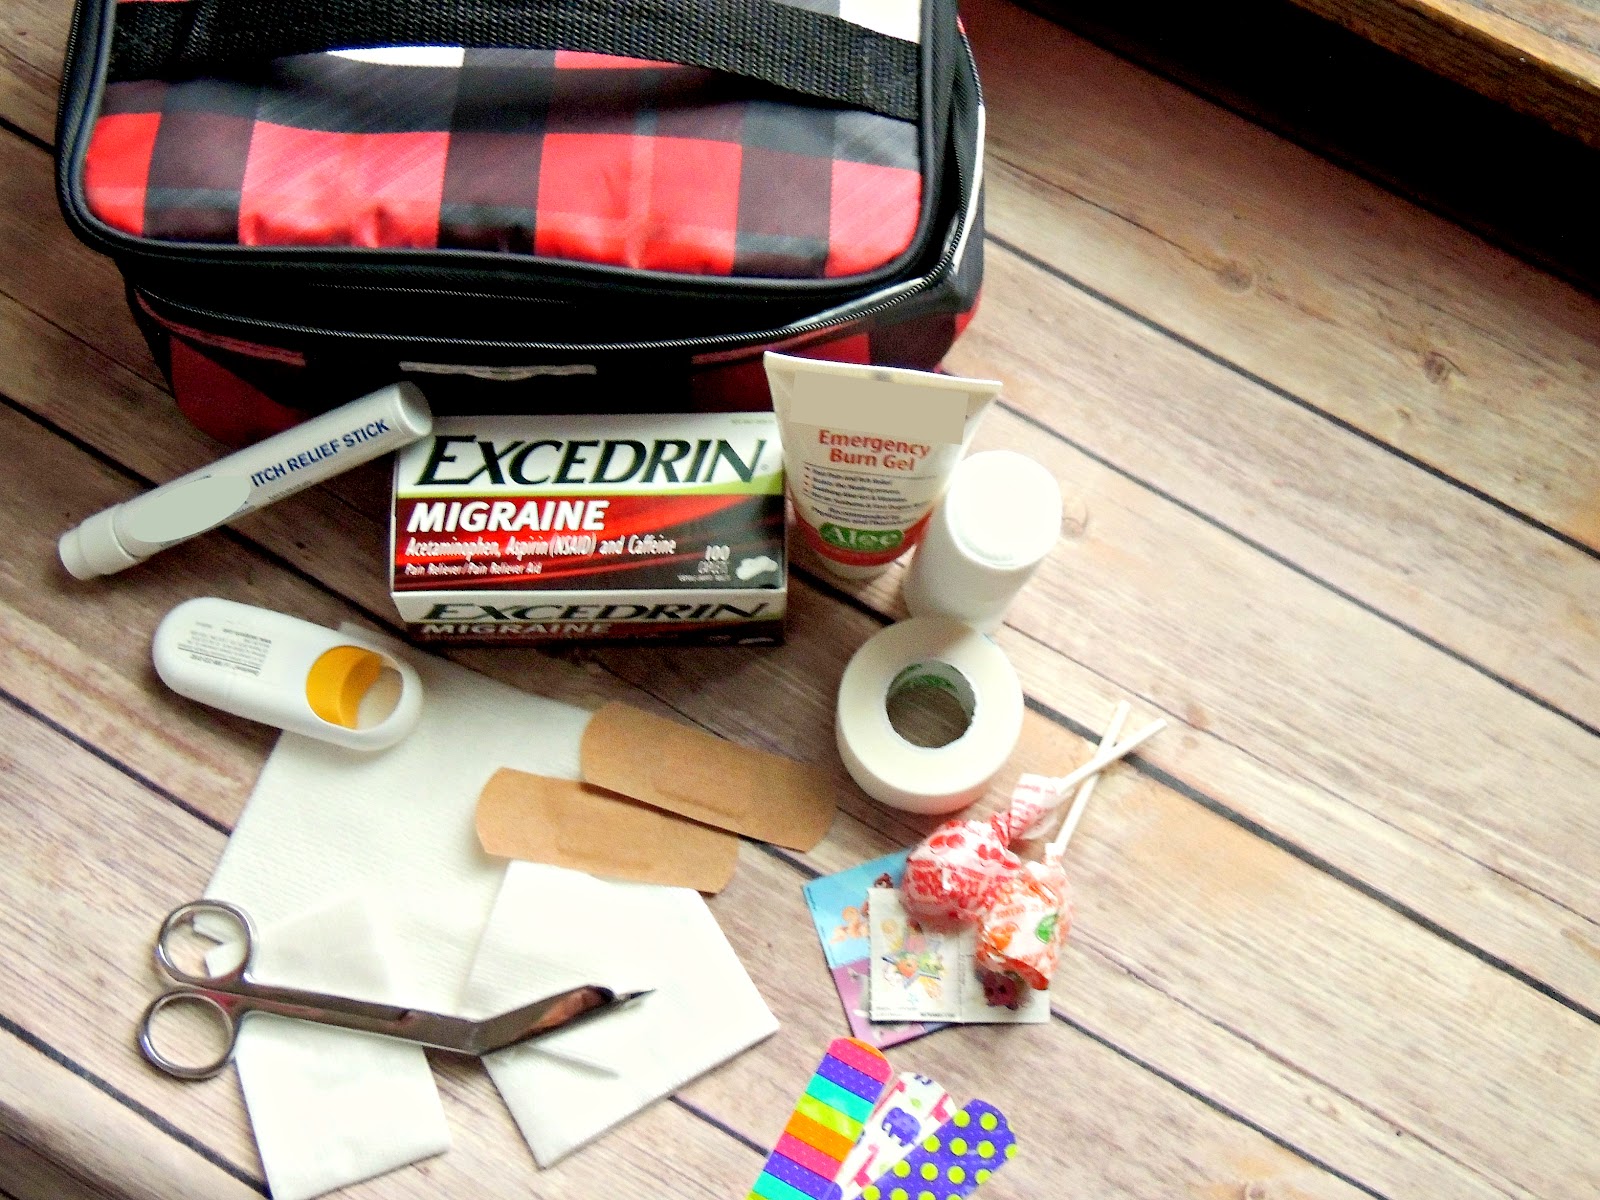
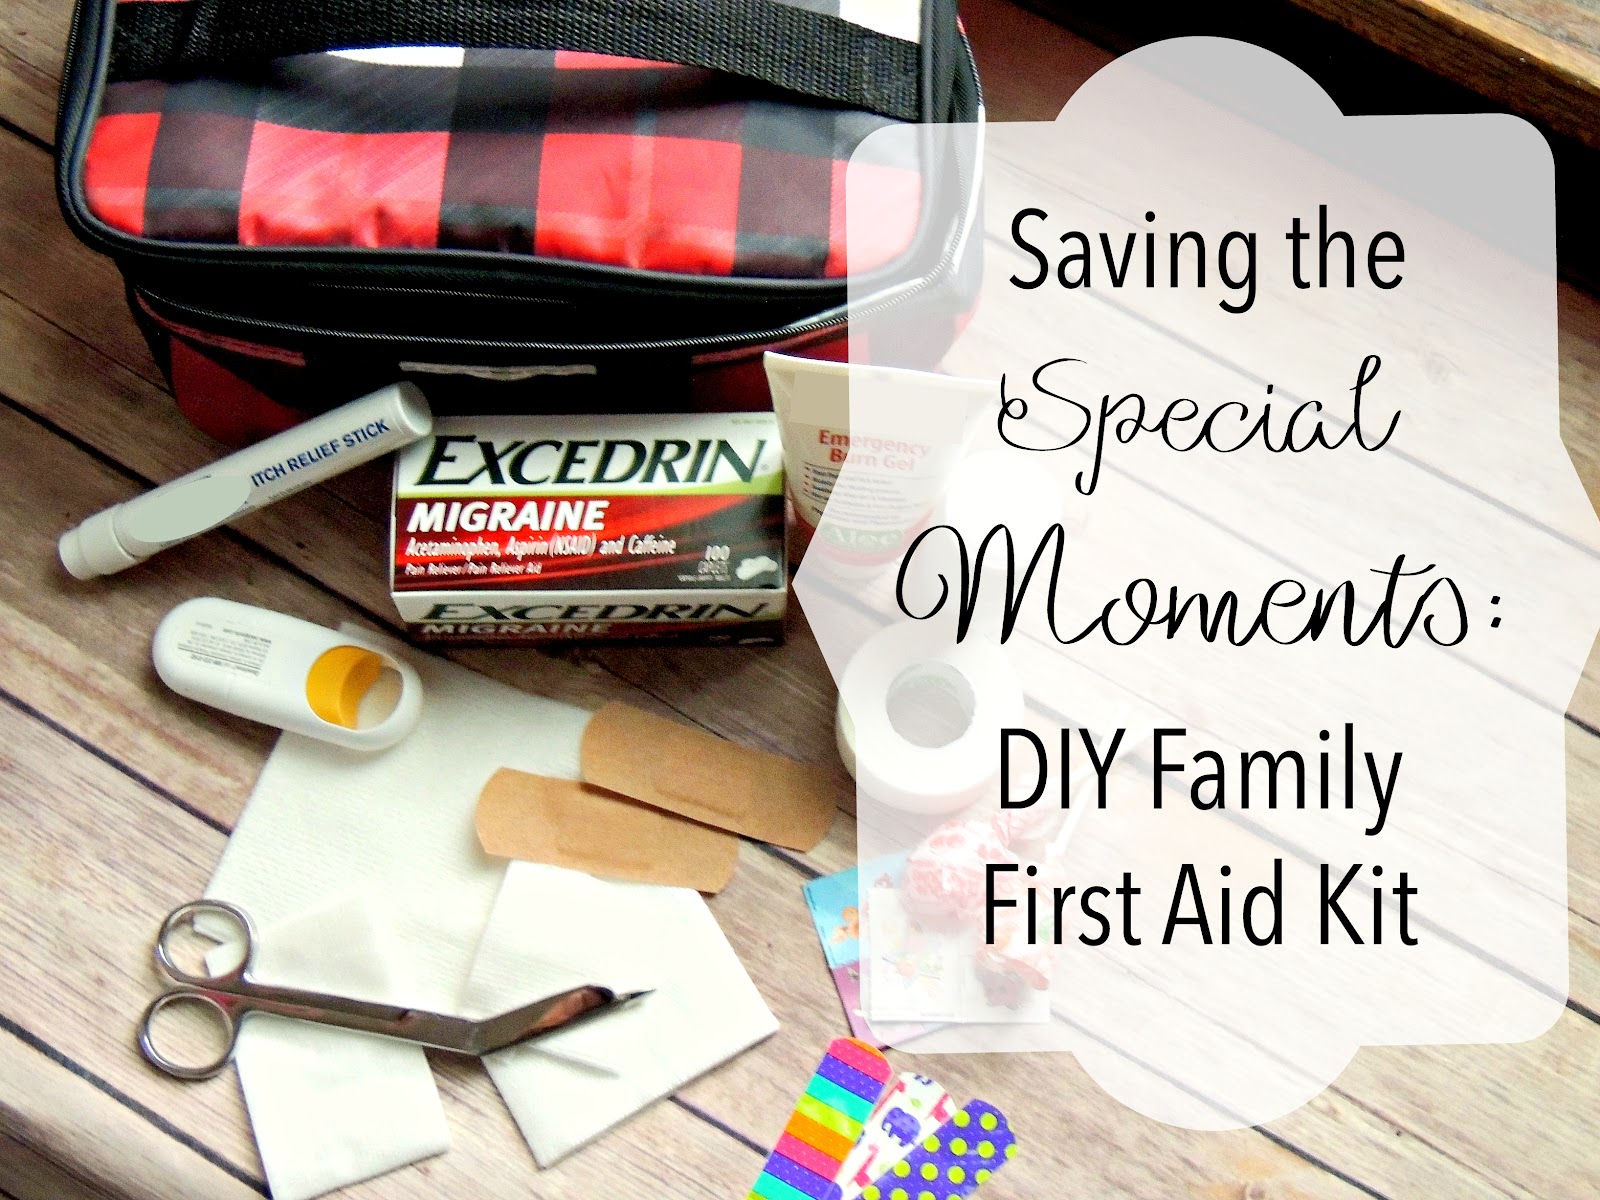
I wanted a first aid kit that not only had the essentials, but also had something for the little one to help turn the tears into a smile when she gets a little owie. So I created my own! It’s super easy to make a family first aid kit of your own.


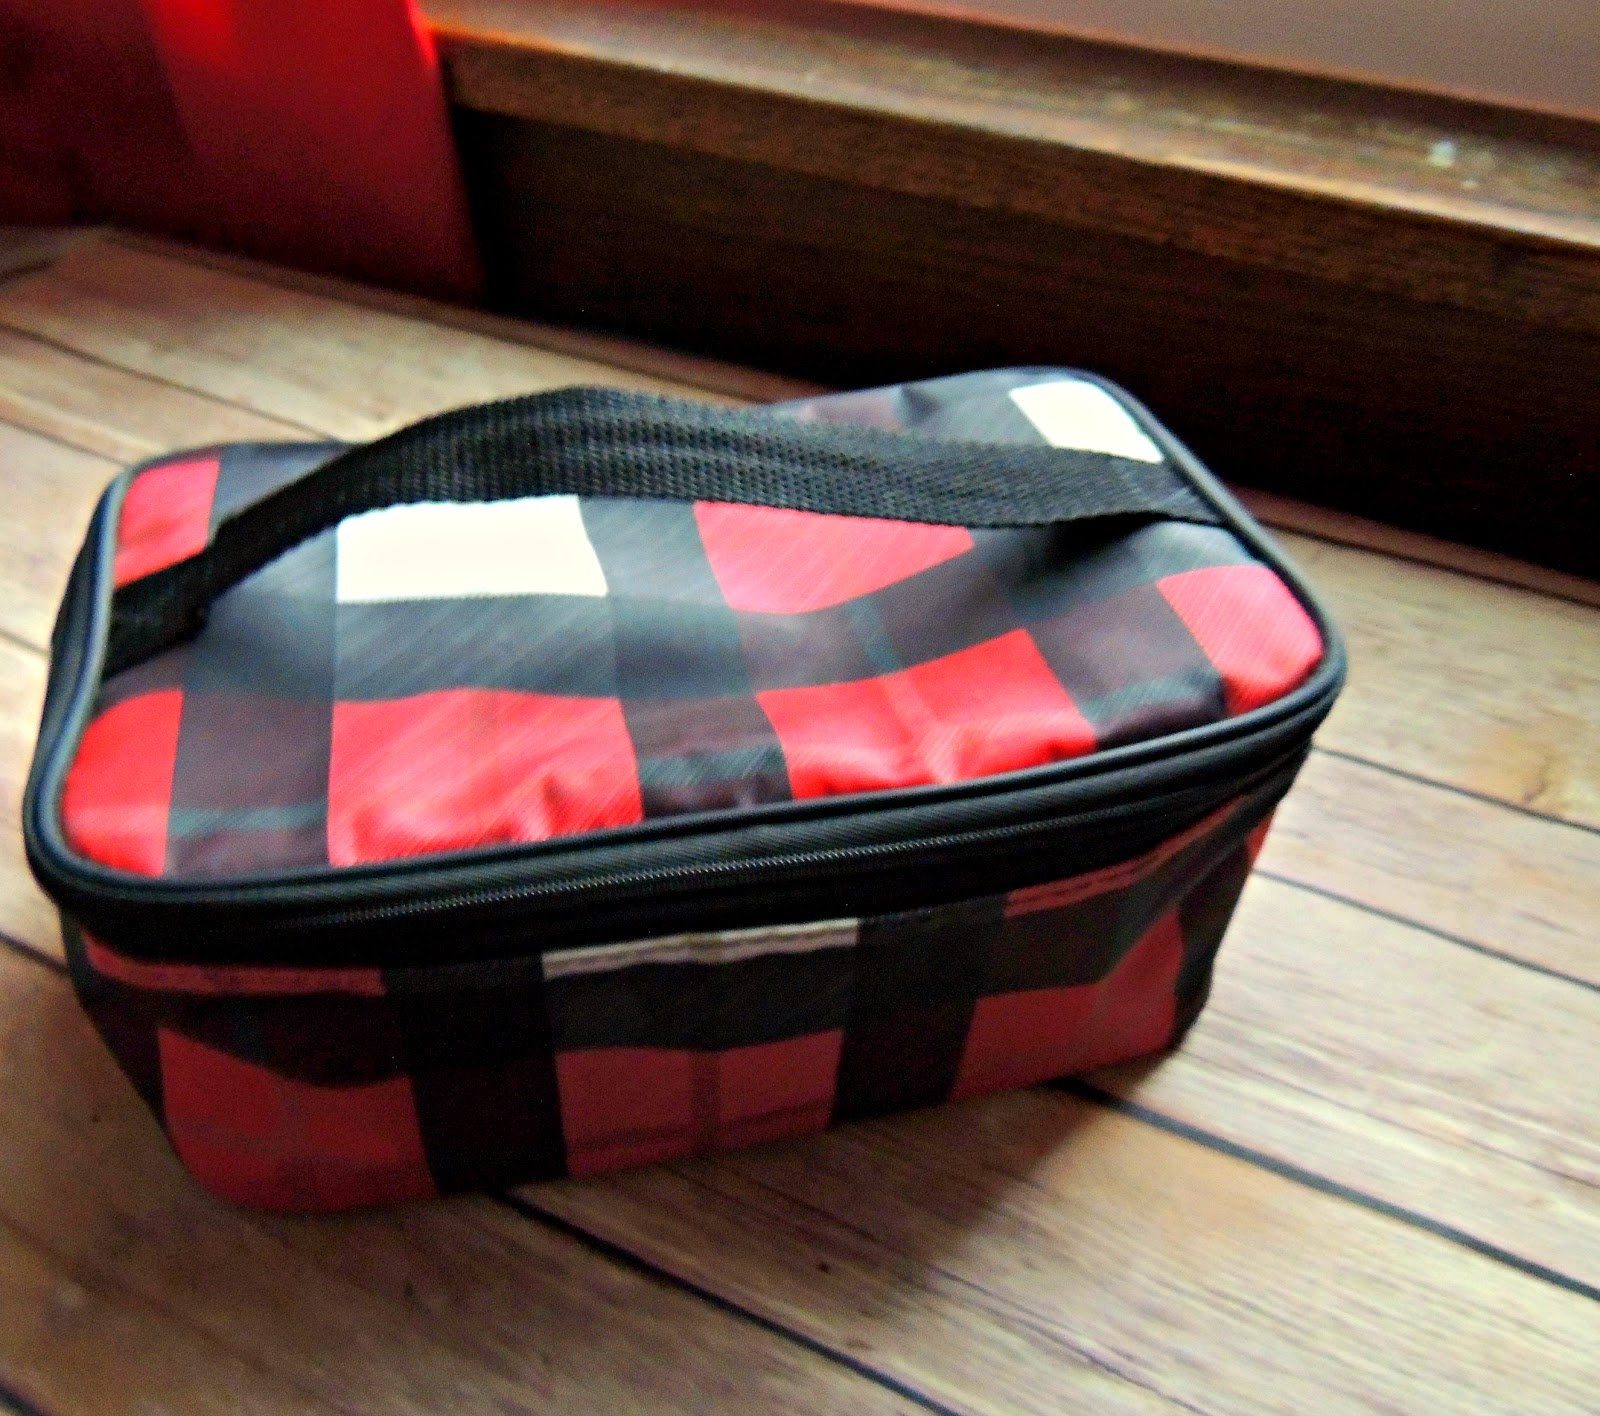
First, you’ll need a case to keep it all in. I just used a Glamour Case that I had on hand because it’s the perfect size, has a handle to make it easy to carry, a couple of compartments, is easy to clean, and is pretty cute too!

Excedrin® Migraine First Aid Kit for the Family #MoreMomentsWithExcedrin #CollectiveBias #ad 5.jpg

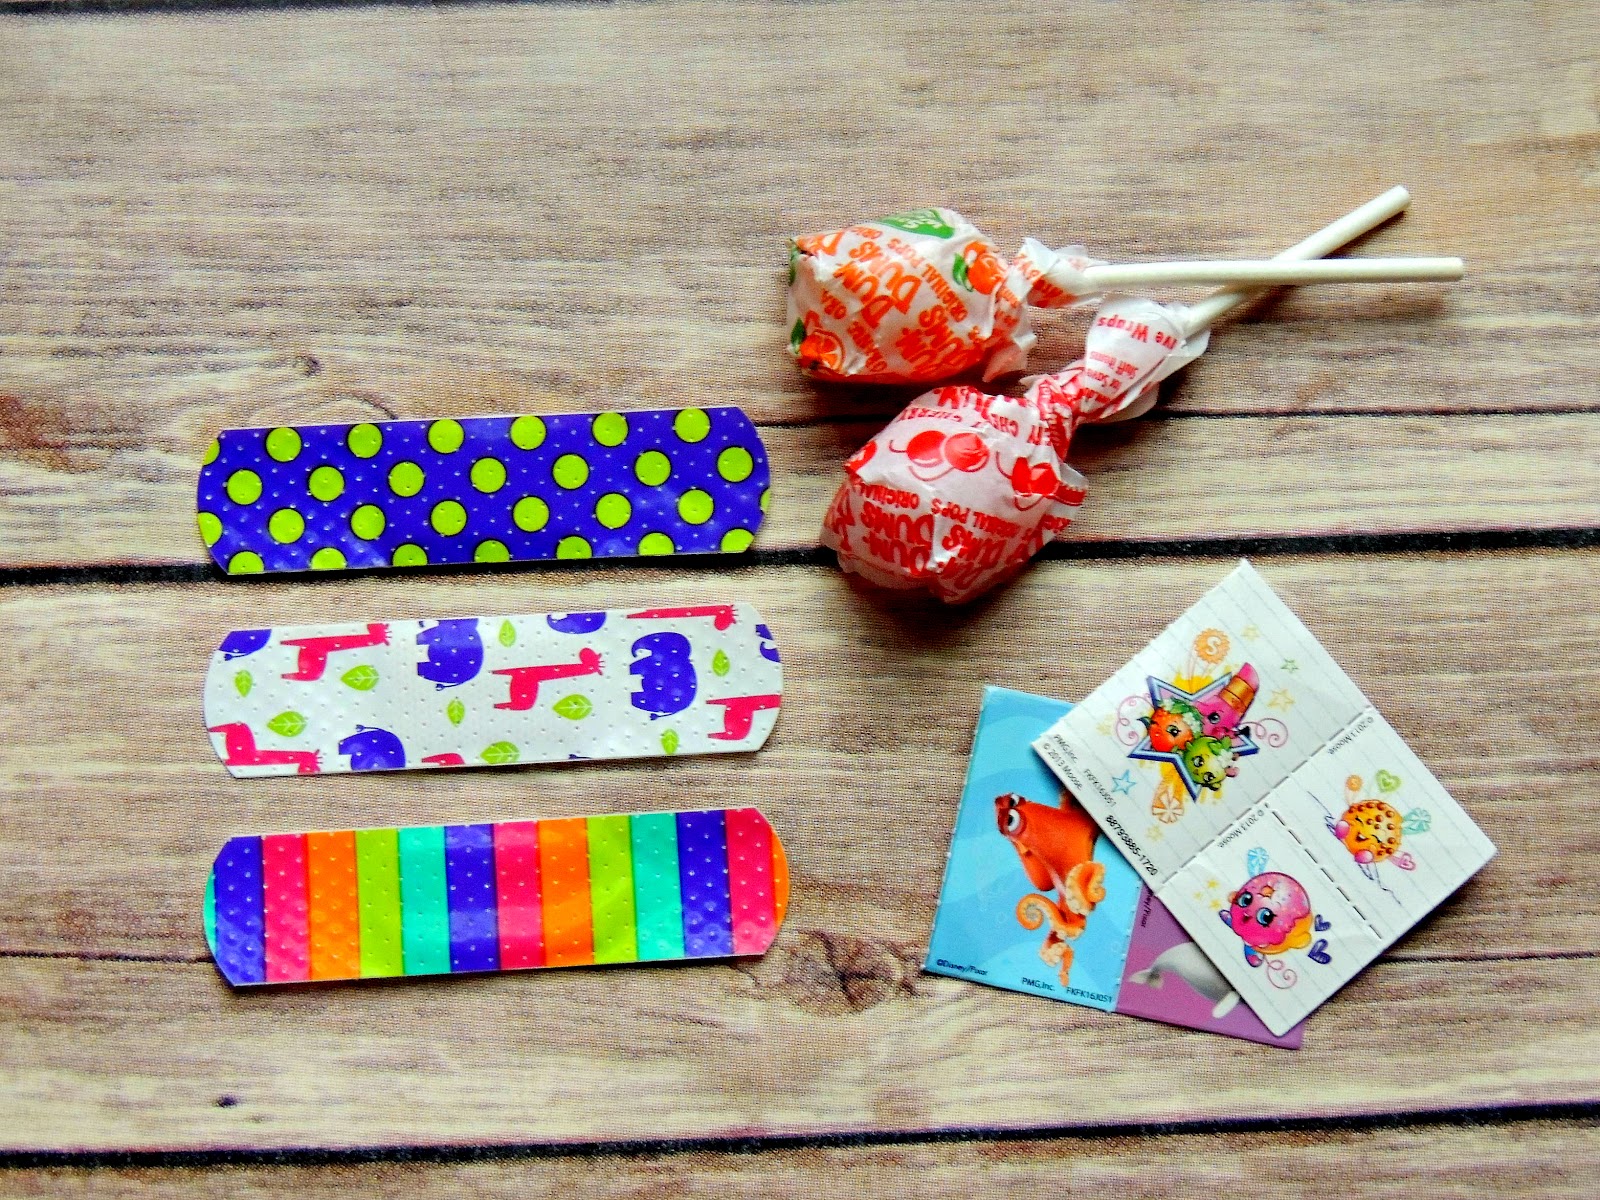
Next, there are some things that are essential in a first aid kit-- stretch rolled gauze, gauze pads of different sizes, and paper tape. Of course, you’ll also need gauze scissors and bandages. I included fun and brightly colored bandages for the little one, and standard bandages for the adults.


Excedrin® Migraine First Aid Kit for the Family #MoreMomentsWithExcedrin #CollectiveBias #ad Wound care.jpg

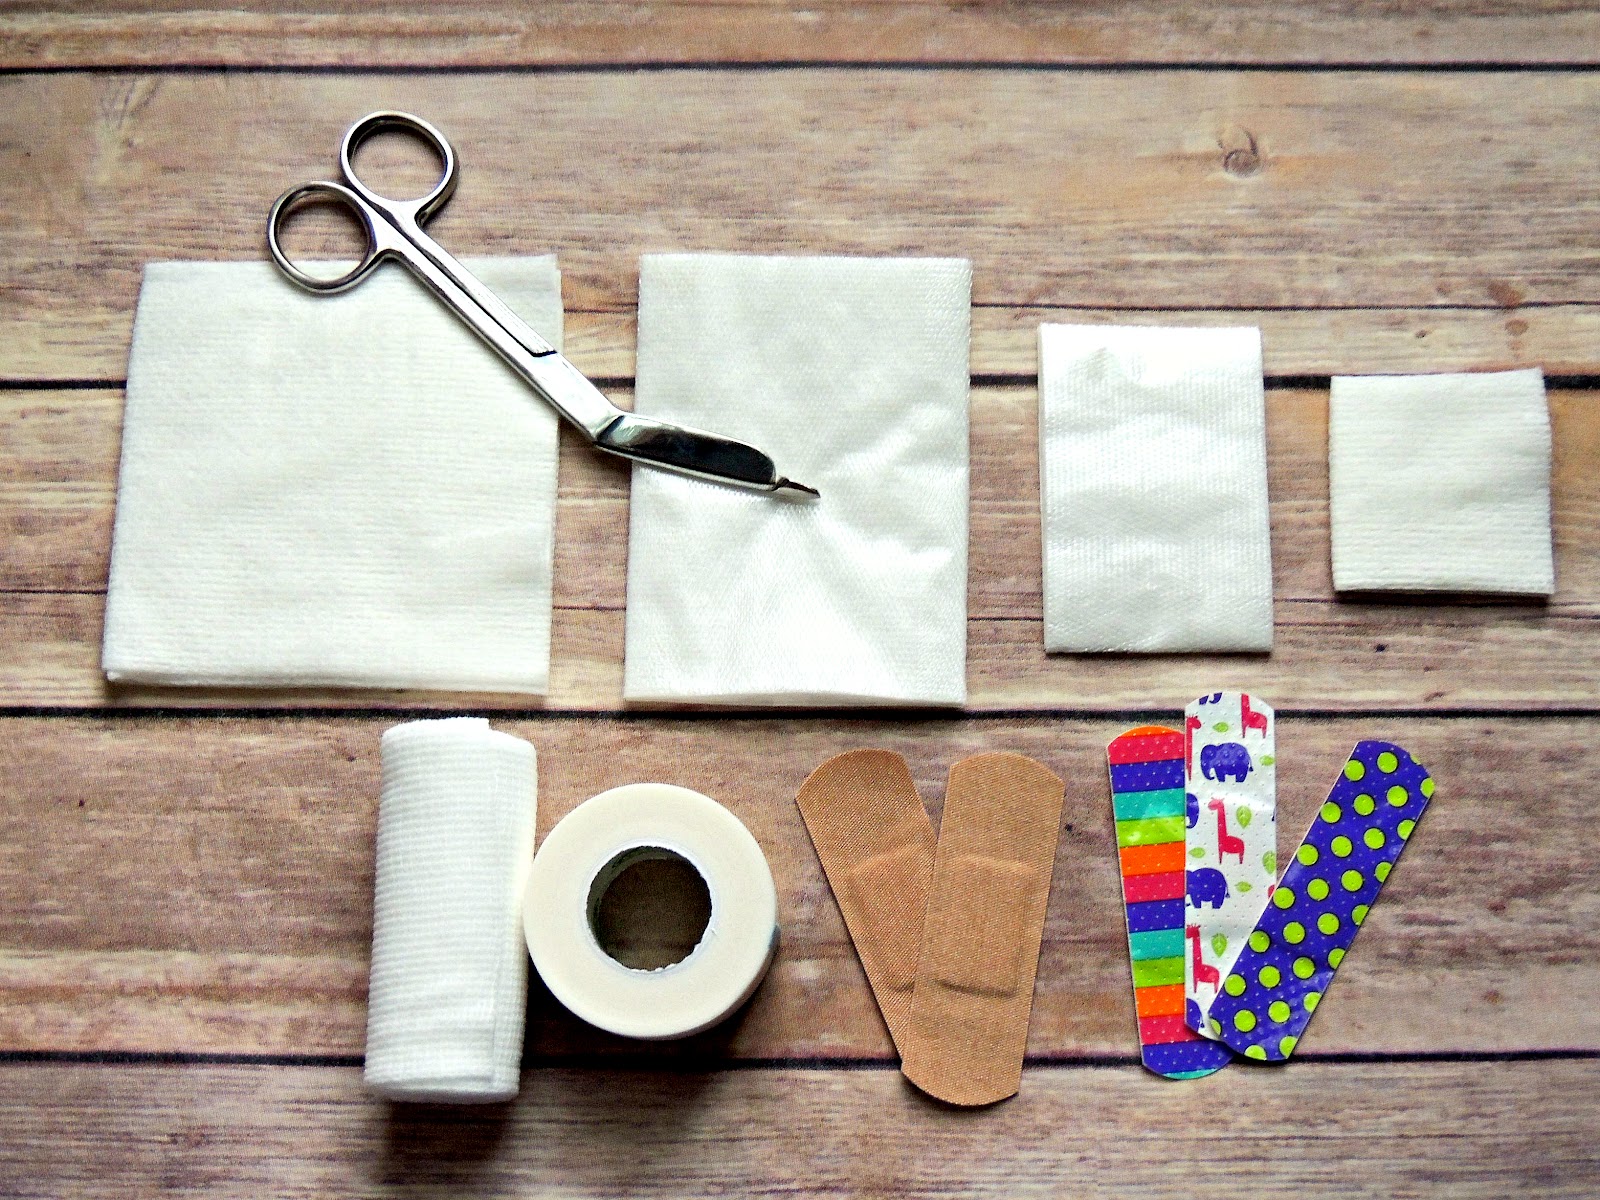
Little Miss Sunshine is always telling me she has an owie because she wants a fun bandage-- so they’re always a hit and sure to bring a smile to a little one’s face. In addition to that, I included a few stickers and little suckers. You could even include small toys from the dollar store that would fit in your first aid kit.


Excedrin® Migraine First Aid Kit for the Family #MoreMomentsWithExcedrin #CollectiveBias #ad for the littles.jpg

Next, I included Excedrin® Migraine, burn gel, antiseptic spray, and an itch relief stick for those pesky bug bites. Everything you’ll need to cure the common concerns.


Excedrin® Migraine First Aid Kit for the Family #MoreMomentsWithExcedrin #CollectiveBias #ad Essentials.jpg

Just place everything in your first aid case of your choice, and you have a handy family first aid kit to keep with you on the go.


Excedrin® Migraine First Aid Kit for the Family #MoreMomentsWithExcedrin #CollectiveBias #ad Kit.jpg


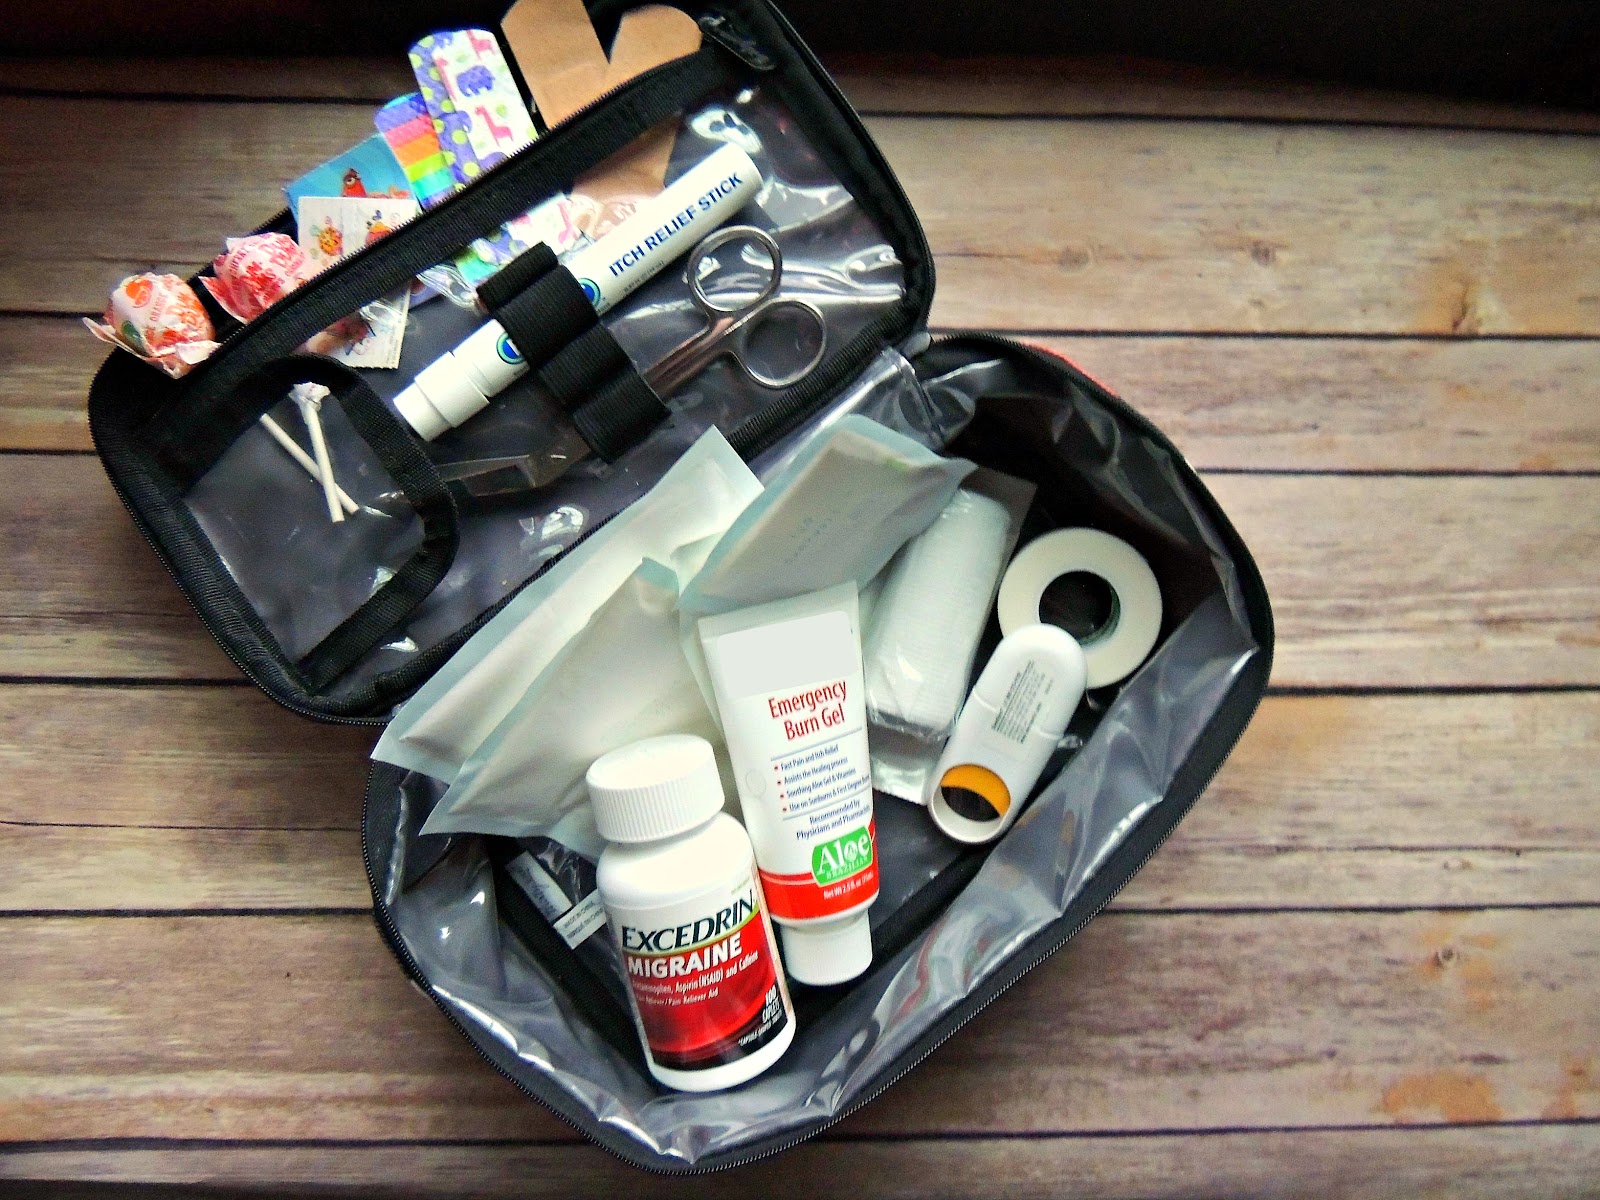
To sum it up, here’s what I used:

  • Glamour Case
  • Stretch rolled gauze
  • Gauze pads of different sizes
  • Gauze scissors
  • Paper tape
  • Traditional bandages
  • Fun, bright-colored bandages
  • Excedrin® Migraine
  • Burn gel
  • Antiseptic spray
  • Itch stick for bug bites
  • Stickers or other fun items for the littles
  • Suckers

The instructions are simple: throw all of the items in your case and you’re good to go!


What would you keep in your family first aid kit? Has Excedrin® Migraine saved special moments in your life?

Thursday, June 9, 2016

Cozy Coupe Makeover Tutorial #FreeToBe #ad

This shop has been compensated by Collective Bias, Inc. and its advertiser. All opinions are mine alone. #FreeToBe #CollectiveBias


You've probably seen that quote going around that gives the definition of a boy, "noise with dirt on it". Whomever created that quote has obviously not met my little girl!

I cannot keep this girl out of the dirt! We have a perfectly nice grass-covered backyard for her to play in and yet she always finds the little spots of dirt and plays there. We recently did some work in the yard and added a fence, so we have some areas that are dirt covered at the moment--and she goes right for these areas!


There have been days where I've had to give her three baths.


If she plays in the sprinkler or her water table, her next stop is the dirt. You can about imagine what her clothes look like after that!


Whether she's playing in the sprinkler, getting covered in dirt, or driving her little Cozy Coupe car--this girl likes to play hard!

Thank goodness for all® free clear detergent! It the #1 detergent recommended by Dermatologists, Allergists, and Pediatricians for Sensitive Skin--which is perfect for her delicate skin and even better for my allergies. It actually removes 99% of everyday and seasonal allergies, including cat and dog dander, dust mite matter, ragweed, grass, and tree pollen. Of course, all® free clear detergent is not intended to treat or prevent allergies.


I've used all® free clear liquid detergent for a long time now because I found that it really helps with my allergies. The strong scents of some detergents out there are just overwhelming to the senses! I don't know how people can walk around all day in such strong smelling clothes. Seasonal allergies are bad enough, I don't want to have reactions to the scents left from my laundry detergent.

I recently purchased the all® free clear Mighty Pacs® and I also use the all® free clear dryer sheets. For all products, make sure to follow the directions for use on the packaging exactly. Make sure to keep out of reach of children!


I buy all® free clear detergent at Menards. It's found near the cleaning supplies, usually at the front of the store.


Speaking of the Cozy Coupe, this was a project I worked on for Little Miss Sunshine's birthday present! I had so much fun working on it and she absolutely loves it. Look how excited she was to receive it on her birthday.


It is surprisingly simple to do a Cozy Coupe makeover and is inexpensive to do. Just watch garage sales or for sale groups-- you're sure to find a Cozy Coupe. I had rebates on the paint too.

I'll walk you through how I completed this Cozy Coupe makeover. It's the perfect pink car for a girl!


Supplies Needed:
  • Used Cozy Coupe
  • Scrub brush
  • Soap or cleaning supplies
  • Plastic sack
  • Spray paint formulated for painting on plastic
  • Tarp, or something to protect the surface where you're painting
  • Replacement Cozy Coupe stickers

Find a Used Cozy Coupe

Just watch garage sales or for sale groups-- you're sure to find a Cozy Coupe. My only suggestion is to make sure all of the parts are in good condition. For example, the one I bought had a broken gas cap and those are a little pricey to replace. Unfortunately, I didn't find that out until after I had purchased it--so our Cozy Coupe is missing a gas cap for now.

Here is the Cozy Coupe, as we purchased it. It was really dirty, the stickers were missing or ripped, etc. To be honest, Little Miss Sunshine didn't care one bit!


Disassemble

It's surprisingly simple to disassemble a Cozy Coupe. Look for the screws and unscrew them. They will be different depending on the vintage that you buy.  I left the steering wheel attached and covered it during painting. If you so choose, you can keep the tires on and just cover the with plastic bags so they don't get paint on them. There's not really an easy way to remove them without breaking something.

Whatever you do, make sure to keep all of the parts in a safe place. I put them in a baggy to keep them all together.


I told you-- she really, really loves her Cozy Coupe!


Clean the Cozy Coupe


Next, you'll need to get to cleaning. You'll want to scrub each piece with a brush to remove all the dirt. This will ensure that the paint adheres.


Rinse the car well to remove the soap.


Allow to dry

Lay all of the car pieces out on a tarp and allow them to dry. It helps to have it outside in the sun.


Paint!

Next comes the fun part-- painting! I used a paint formulated for plastic-- it was a paint & primer in one.

I used two colors for this project, Magenta and Canyon Black. I needed two cans of the Magenta since I used a lot more of that than the Canyon Black.

Lay the pieces out on a tarp to paint. Cover the steering wheel with a plastic bag to protect it from the paint.


It took a couple of coats for each piece, allowing time in between to dry.


Final Touches

Once the paint has fully dried, you are ready to reassemble the Cozy Coupe. Once that's completed, you can add any finishing touches that you want.

I purchased replacement Cozy Coupe stickers on eBay. They have some really cute stickers listed! Just make sure to buy the right stickers for the vintage Cozy Coupe you are working with.


I also decorated this car with stickers that I found on clearance for just a few cents. Tip: make sure the stickers have good adhesive.


And that's how easy it is!

There are so many possibilities for Cozy Coupe Makeovers. If you need ideas, just search for them on Pinterest!

Since these pictures were taken, the little one has dumped dirt on this car multiple times. I just can't keep her out of that dirt!


You can continue the conversation in the all® free clear community and connect with parents just like you! Give it a try and buy all® free clear detergent. Does your little one like to play hard and get dirty? Share a story in the comments!

Thursday, May 5, 2016

The Purr-Rect Litter Box Setup #YouGottaBeKittenMe

This shop has been compensated by Collective Bias, Inc. and its advertiser. All opinions are mine alone. #YouGottaBeKittenMe #CollectiveBias


You've heard the stories that people tell about their cats. They usually include something like this, "Little Whiskers is so smart. He thinks he's a person. He knows how to make me coffee (2 pumps caramel, 2 sweeteners) and fetches my newspaper every morning." And you're just sitting there like, "riiiiight."

People love their furry friends like they love their children. These exaggerated cat stories are the equivalent of the "My son is an honor roll student" bumper stickers.

If you're a cat owner you have to admit that you've been guilty of gushing over your four-legged fur-ball of joy a time or two. It's ok, it just means that you're smitten with your kitten--you're a good mama to your babies.

Let me tell you a few stories about my feline friends.

My long-haired, lion-cut cat named Dudley thinks he's a dog. He does, I swear.


Dudley also thinks he's a person. I mean, he can open a door by reaching his paw up and turning the knob. I kid you not. Dudley is also a genius--the Einstein of felines.

And then we have Daisy. She's all sass and 100% cat.


She does not think she's a dog. She does not think she's a person. She acts likes a cat, thinks like a cat, and meows like a cat. She's comfortable in her own fur. She's persistent--annoyingly so.

She's a princess and she knows it.


When Little Miss Sunshine was born, I was so afraid to have Dudley and Daisy near her because I was nervous they would try to hurt our beautiful baby girl. It didn't take long before I realized that Dudley and Daisy are the ones who need protecting from the wild-child that hubby and I created.

Can you see the look of fear when they hear the toddler coming?


These two cats of ours are with us for better or for worse. They often drive me crazy, but I'll be sad when they're gone. Pets are sneaky like that--they find a way into your heart and become a part of the family.

Cats are easy to take care of because they do most of the work themselves. One of the few responsibilities a cat owner has is to provide a litter box and to keep it clean. Don't worry if you don't have a good litter box set up--cats are resourceful and they'll find somewhere else to do their business. No biggie, right? Eek!

Many of us probably didn't even think twice when we set up a space for the litter box, but it turns out that cats are very sensitive to such things and will let you know if the litter box is not up to their standards. And rightfully so, you wouldn't like doing your business in an uncomfortable space either.

Here are a few tips for the purr-fect litter box set up. Your cats will thank you for considering their litter box needs.


Size Matters


Make sure the litter box is large enough for your cat. It should be about the length of your cat and wide enough for him/her to turn around in. If the litter box isn't big enough, you may find your cat missing the box. Make sure the sides are easy to step into, especially if you have an older cat or a kitten. On the same note, the litter should be anywhere from 2-4" deep, and less for kittens.


No Lids Allowed


A litter box with a lid is the equivalent to a hot and stuffy port-a-potty for humans. Just, Ew. Cats have an extremely powerful sense of smell and a lid simply traps the odors inside, making it un bearable.


Here's the Scoop


I'm not a fan of cleaning the litter box, but I don't know anyone who is. The best practice is to scoop the litter box twice per day. Keeping it clean makes it more comfortable for your cat and also ensures he/she can find a spot to do their business in the box instead of elsewhere. While it may be tempting to use a plastic liner or garbage bag, cats do not like the noise and may avoid the litter box because of it.


Give it a Good Scrubbing


At least once a month, empty the litter box and scrub the box with mild soap and water. Don't use soap with a strong scent as it will be bothersome to the cat's senses.


Location, Location, Location


Picking the perfect location for the litter box is key. There should be at least one box on each level and it should be easy and convenient to get to but also provide your cat privacy.

Be sure to keep the litter box location separate from the eating area-- you wouldn't want to eat in the bathroom. On another note, the location should be relatively quiet and away from any loud noises (think appliances).

The location of the box should give your cat a maximum visual advantage so he/she is not ambushed by an opponent (i.e. another cat, dog, toddler). The corner litter box (shown above) is perfect for this reason.


Do Yourself a Favor


Nobody wants their house to smell like cat poo. One way to avoid this is to keep the kitty box away from any heat source (like the furnace). The heat will cause the odor to become stronger.

Another great way to keep the odors down is to use Fresh Step Total Control with the Power of Febreze because it contains Borate Technology, which prevents the growth of odor-causing bacteria. This doesn't mean the litter has a strong "scent" either, it just has the odor controlling properties of Febreze.

I found Fresh Step Total Control with the Power of Febreze in a 42 lb. bag in the pet supplies aisle at Sam's Club--which is the only place it's sold. It's resealable too--making it easy to store. From 5/11 - 6/5, a $3.50 off coupon is automatically loaded on your Sam's Club card if you're a member.

Pick a litter box location with a floor surface that's easy to clean. Obviously, it's not a good idea to put the litter box on carpet or a porous surface. 


A Plus One

The general rule is to have one litter box per cat, plus one more. This rule applies to each level of the home too. If you have multiple cats, they may or may not use the same litter box. Some cats prefer to use one litter box to urinate and a separate litter box to defecate. It's important to provide options for your cat.


Thanks to Sam's Club, I was able to donate $100 to Last Hope Animal Rescue--a non-profit animal rescue organization in Cedar Rapids, IA which provides foster homes and adoption services for cats and dogs. What a great organization!


Go ahead and brag about your cat in the comments! What does your little whiskers do that's special?

Friday, April 22, 2016

Emergency Snack Kit with Lorissa’s Kitchen #SavvySnacking

This shop has been compensated by Collective Bias, Inc. and its advertiser. All opinions are mine alone. #SavvySnacking #CollectiveBias


I’m the mom who packs a purse with all of the essentials and more. Whatever you need can likely be found in my purse if I do a little digging. I keep a bag in the car that’s stocked with extra diapers, extra snacks for the little one, wipes, an outfit, gloves, a hat, pacifiers, sunscreen, tissues, and more. I’m always prepared.

While I always have snacks packed for Little Miss Sunshine, I almost always forget about packing healthy snacks for myself. Before I know it, I find myself in the drive-through getting a drive-through quality snack. Epic fail for my weight loss and health goals.

So I came up with the idea of creating an emergency snack kit with healthy snacks that I can keep in the car or in my purse for when I’m on-the-go and hunger strikes.


It’s easy to assemble a kit of your own. It’s literally only two steps!


Step 1: Choose a Bag


I found my bag in the cosmetics section. I love the bright chevron pattern. Pick out a bag that’s small enough to fit into your bag and large enough to contain your favorite healthy and portable snacks. Choose something fun so that you are motivated to carry it with you.


Step 2: Choose Your Snacks


Choose a variety of snacks for your Emergency Snack Kit. Think of the cravings you often have and prepare accordingly. Prepare for sweet, salty, and everything in between.


{Sweet Granola}


A healthy version of a granola bar can be a great way to satisfy a sweets craving. This specific granola bar is even made with Chia. Be sure to check the ingredients to make sure your granola bar choice meets the requirements of your eating plan.


{Pack a Protein Punch}


I try to add as much protein into my diet whenever I can. It helps me feel full and satisfied longer. There aren’t a lot of options for portable protein snacks.

I love Lorissa’s Kitchen Korean Barbecue Beef premium protein snacks. It’s super moist and flavorful, low in carbs & fat, has no MSG or preservatives and is also gluten free. That’s a snack I can feel good about packing in my Emergency Snack Kit.

I found them at Walmart by the checkout area.


There are also Lorissa’s Kitchen Sweet Chili Pork and Szechuan Peppercorn Beef flavors- these are definitely for spicy food lovers!

There’s a Lorissa’s Kitchen sweepstakes with the chance to win a $100 Walmart gift card which is running through 5/20—think of all of the emergency snacks you could buy with $100. That’s a lot of free groceries. You can enter below.

Lorissa's Kitchen #SavvySnackingSweepstakes


{Gum: Chew on That}


As I am working on overcoming my eating issues, I have been advised numerous times to chew on gum when I feel the urge to want to eat and I’m not really hungry. These are more emotional cravings. Chewing on gum can keep your mouth busy and can even help with your sweet tooth.


{Get a Little Nutty}


There are times in life when going nuts is perfectly healthy. I’ve found that it’s better if I have a pre-portioned amount of nuts rather than snacking out of the container. The 100 calorie packs are super handy for this reason. Nuts contain healthy fats, protein, and the extra crunch can fulfill that need for something to munch and crunch on.


{Hydration Inspiration}


I love water. I drink it all day, every day. Ounces and ounces of crystal clear goodness. In the afternoon I’m often looking for a little something sweet. There are so many options for flavored drink drops to give a little flavor to your H2O. The awesome part is that these are super portable and they will save you tons of calories.


{Salty & Sweet}


You have to be really careful with trail mixes because they can pack in a lot of calories into a very small serving size. But sometimes you need that perfect mixture of savory saltiness and indulgent sweetness. I like this tropical blend which includes dried coconut—yum!


{Minty Fresh}


Pop a peppermint in your mouth and chances are that the strong flavor will leave you feeling satisfied. Let’s face it, your friends, family, co-workers, clients, and customers will thank you for popping one of these in your mouth before your next meeting. Two jobs. One peppermint.

If you fail to prepare, then prepare to fail. I can tell you that statement is 100% accurate. I’ll be tucking this handy little Emergency Snack Kit into my purse and will prepare to succeed!


What will you pack in your Emergency Snack Kit? What flavor of Lorissa’s Kitchen premium protein snack would you choose?

Thursday, October 22, 2015

DIY {Sharpie} Cat Food Dish Tutorial

This shop has been compensated by Collective Bias, Inc. and its advertiser. All opinions are mine alone. #MyCatMyMuse #CollectiveBias

I’ve been in the crafting mood lately and I love to get in touch with my creative side in ways that don’t include writing. I’m no artist, but I do have tons of fun being artsy—or at least attempting it!

Dudley and Daisy (our furry feline older children) were in need of new food dishes so I seized the opportunity to get creative. The dishes that I created turned out adorable!

DIY Sharpie Cat Food Dish Tutorial

Here’s the tutorial and recap of the process in case you want to try your hand at this project. It’s super easy!

What you’ll need:


supplies needed for sharpie cat dish

  • An oven safe dish (ceramic)Make sure to pick out a dish that your cat will be comfortable with. This site has great information on the topic.
  • Oil based SharpiesThese will have a band around the bottom of the pen with “oil based” printed on it. You can find them at a craft store or Amazon.
  • Rubbing alcohol
  • Nail polish remover
  • Q-tips
  • Cotton balls


Instructions:

Step 1: Wash your dish with soap and water and remove any stickers and adhesive residue. Dry with a clean towel. Wipe all surfaces of the dish with rubbing alcohol on a cotton ball. Allow to dry.


Wipe all surfaces of the dish with rubbing alcohol on a cotton ball. Allow to dry.


Step 2: Begin creating your design using the oil-based Sharpies. From experience, it’s best to work your way from the inside of the dish, to the sides, to the top edges to ensure that you don’t accidently smudge your design.

However, if you do smudge your design or aren’t happy with what you’ve drawn, it can be easily removed with a little nail polish remover on a Q-tip or cotton ball—I also used a nail polish remover pad and it worked great for larger areas.

Please note that while oil-based Sharpies are non-toxic, Sharpie does not recommend using them on a surface which comes in contact with the mouth or tongue—if you are worried about this and want to create a design on the inside of the dish, you can cut out a hard piece of clear plastic to cover the shape of the inside of the dish. (remember these are dishwasher safe, so the paint stays on quite well)

it’s best to work your way from the inside, to the sides, to the top edges to ensure that you don’t accidently smudge your design


Step 3: Once your design is finished, allow the dish to dry for about 24 hours. I let mine dry for about 18 hours and it worked perfectly.

Once your design is finished, allow the dish to dry for about 24 hours.


Step 4: Place the dish on a cookie sheet and place it into a cold oven. The dish must preheat along with the oven to ensure that it doesn’t crack due to extreme temperature change—this is very important!

Set the oven to 375 degrees and let bake for 30 minutes.

There will be a strong paint smell as they bake, so I recommend opening a window for ventilation during the process.

Place the dish on a cookie sheet and place it into a cold oven. The dish must preheat along with the oven to ensure that it doesn’t crack due to extreme temperature change—this is very important!


Step 5: Once the 30 minutes is up, turn the oven off but DO NOT open the oven until the oven has cooled completely—this may take quite a while. Once again, the sudden change in temperature could cause the dishes to break if you open the oven immediately.

Once cooled, remove the dishes and admire your handiwork! The colors tend to change once baked—I actually loved how mine turned out. The purple turned to a darker pink, so I ended up with a dish of two colors of pink and it’s really cute! Daisy loves it, she meowed it to hubby when he fed her.

The colors tend to change once baked

Sharpie cat dish detail

Meow detail on Sharpie cat dish

Purr detail on Sharpie cat dish

Completed Sharpie cat dishes

These are dishwasher safe (only if you used OIL-BASED Sharpies as the tutorial instructs), but hand washing is best. Be sure to wash these before feeding your furry friend!

Hubby fed the cats a Purina Muse® Natural Cat Food specialty in their special new dishes—spoiled little buggers.

Dudley devoured the Natural Tuna and Seabass Recipe and Daisy enjoyed the Natural Herring and Salmon Recipe

Dudley devoured the Natural Tuna and Sea bass Recipe and Daisy enjoyed the Natural Herring and Salmon Recipe. They licked their dishes clean—the food was obviously a flavorful hit with them!

Purina® Muse Natural Food products exclusively available at PetSmart

I found the Purina® Muse Natural Food products at PetSmart (where the product is exclusively available) in the cat food aisle.

Purina® Muse at Petsmart

Choosing which food to buy isn’t a dilemma with Muse because it’s a quality food product. With Muse you don’t have to choose between natural nutrition and food that tastes great. Your cat can have both when you choose Muse. You try to eat nutritious food and as naturally as possible, so why shouldn’t your cat be able to eat the same?

There are a variety of wet recipes available in Chowder, broth, with toppers, in gravy and paté—all are made with real fish or poultry and contain no artificial flavors, colors or preservatives. There are 30 delicious recipes and 24 of them are grain free. Natural has never been so delicious. Put Muse to the test with our clean plate guarantee. Here’s a coupon to get you started.


How will you design your cat food dish? What flavor Purina® Muse Natural Food products would your cat love best?

LinkWithin

Related Posts Plugin for WordPress, Blogger...